GPT Image 2.5 Flare and Sunburst product imagery suggests two serum-bottle directions: one looks cleaner and sharper, while the other gives glass refraction and edge highlights more visual complexity. Whether an image is ready to use still depends on how its transparent edges hold up on different backgrounds, whether a local edit preserves the subject, and whether multiple references can share one believable scene. The following sections turn these product-image tasks into reusable prompts and review steps.
Separate the background from the subject
A transparent PNG lets a page provide its own background instead of disguising a white canvas as transparency. Glass products can look different against different tones. And an image that appears transparent in a comparison does not prove that the exported file has an alpha channel; check the actual export separately. The next section covers edge inspection, and the delivery check should confirm the file's transparency channel.
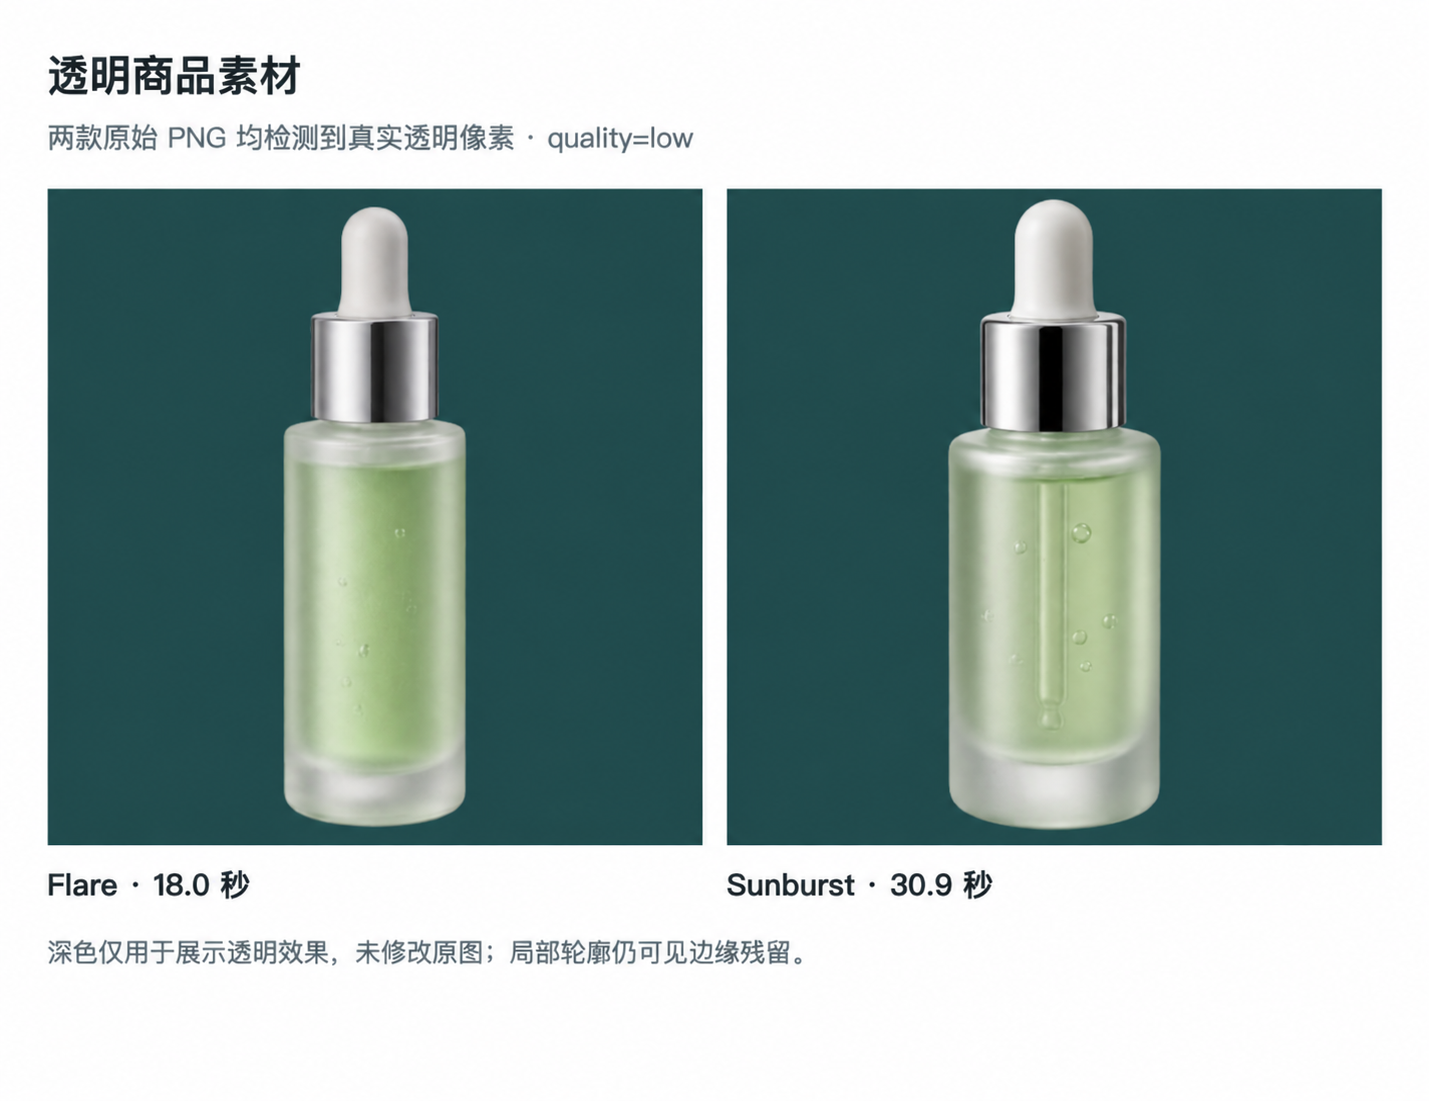
Figure: Flare is on the left; Sunburst is on the right.
Keep the product consistent with a specific prompt
Describe what must stay fixed before describing the lighting and background. Start with the bottle shape, cap, liquid color, and camera angle. Then ask for a fully visible subject with subtle glass reflections. Set the transparent output separately. For clean product assets, state that there should be no label, logo, text, or watermark so the image does not acquire invented packaging details.
Create a clean product photograph of a pale mint glass serum bottle with a dropper.
Keep the bottle shape, cap, camera angle, and proportions consistent.
Preserve subtle translucent glass edges and realistic highlights.
Use a transparent background. No label, logo, text, numbers, or watermark.
When an image interface supports these options, request transparency and PNG output as separate parameters instead of relying on prompt wording alone:
{
  "background": "transparent",
  "output_format": "png",
  "quality": "high"
}
The two visual directions can also be guided with prompt details: pale glass and low-saturation light tend to create a softer, cleaner product image, while a dark cap and clear rim light feel more dramatic. Name the material, color, and light direction to help keep the styles distinct.
The visual direction of Flare and Sunburst
In this example, the Flare bottle looks cleaner and sharper, while Sunburst shows richer glass refraction and edge detail. These are observations about this image, not a guarantee about every generation or a model ranking. For a simpler look, reduce background props, keep colors subdued, and specify soft light. To emphasize glass detail, describe a side or rear rim light, layered refraction, and controlled highlights, while asking for a blank label area. Be specific about the bottle shape, cap, liquid color, camera angle, and light direction to keep the two styles from converging on the same generic product image.
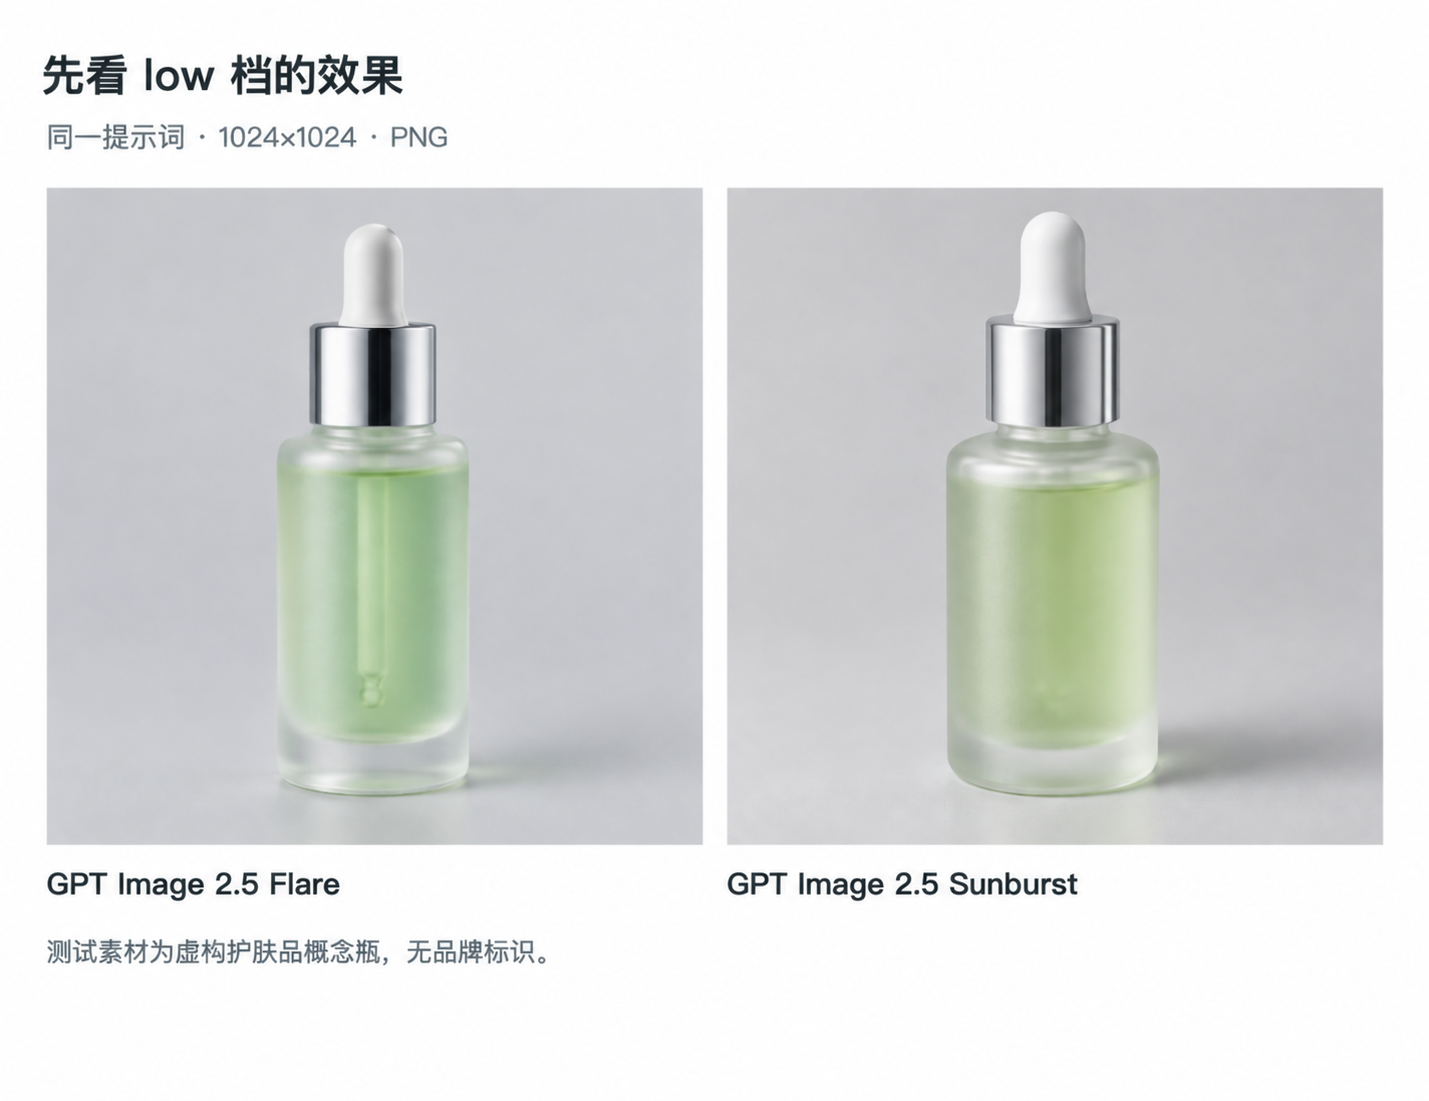
Figure: Flare is on the left; Sunburst is on the right.
From the site model picker to a downloaded image
Open the site's image generator and choose an available GPT Image 2.5 model from the model menu. Describe the product, material, background, composition, and lighting in the prompt. Upload a reference image when you need to preserve the shape of a particular item. After generation, review the result in the output area and use its download action to save the image. Reference upload availability depends on the selected model and the current interface. The web page uses its own model parameters; the background: transparent and output_format: png example above applies to an API that supports those fields and does not imply that the web interface has identical controls.
If an interface exposes low, medium, high, xhigh, max, and auto, start with a faster setting to check placement and composition, then increase detail when needed. low and medium suit quick checks; high, xhigh, and max can suit work that needs more detail but usually need more time. auto lets the interface or API choose according to its rules; it does not mean the highest setting. Let long tasks continue or make results available later instead of treating one wait timeout as proof of failure. Check the active API for supported values and time limits.
Check glass edges, fine noise, and a dark background
Glass does not have one uniform outline. Thickness, refraction, background, and lighting all affect its edges. Small variations may be part of the material, while other speckles can come from background color contaminating semi-transparent pixels. Zoom in on the shoulder, base, opening, liquid line, and dropper connection. Then place the PNG over light, mid-gray, and dark backgrounds. A temporary dark gray or black surface makes pale contamination, broken edges, and fine noise easier to spot; a mask view can help inspect the boundary between the subject and transparency. Remove artifacts without cutting away the natural translucent transition. Finally verify that the exported file has a real alpha channel and repeat the check after conversion or compression.
Change one detail without repainting the product
Localized editing works well for adding a fine rim, repairing a reflection, or adjusting one edge. Whether or not the tool provides a selection or mask, keep the edit focused on the target detail, then name both the requested change and the parts that must remain untouched. For example:
Add a thin metallic gold rim to the red ceramic cup.
Keep the cup silhouette, handle, camera angle, reflections, and background unchanged.
Do not alter the serum bottle.
When adding only a gold rim to a red cup, limit the change to a narrow metallic accent and specify that the body, handle, reflections, and background must stay intact. Compare the opening ellipse and perspective with the original, confirm the gold follows the rim continuously, and check that the non-target details remain. If the gold crosses the silhouette, replaces the existing highlight, or changes the cup shape, further restrict the editing area if the tool allows it and restate which details must remain.
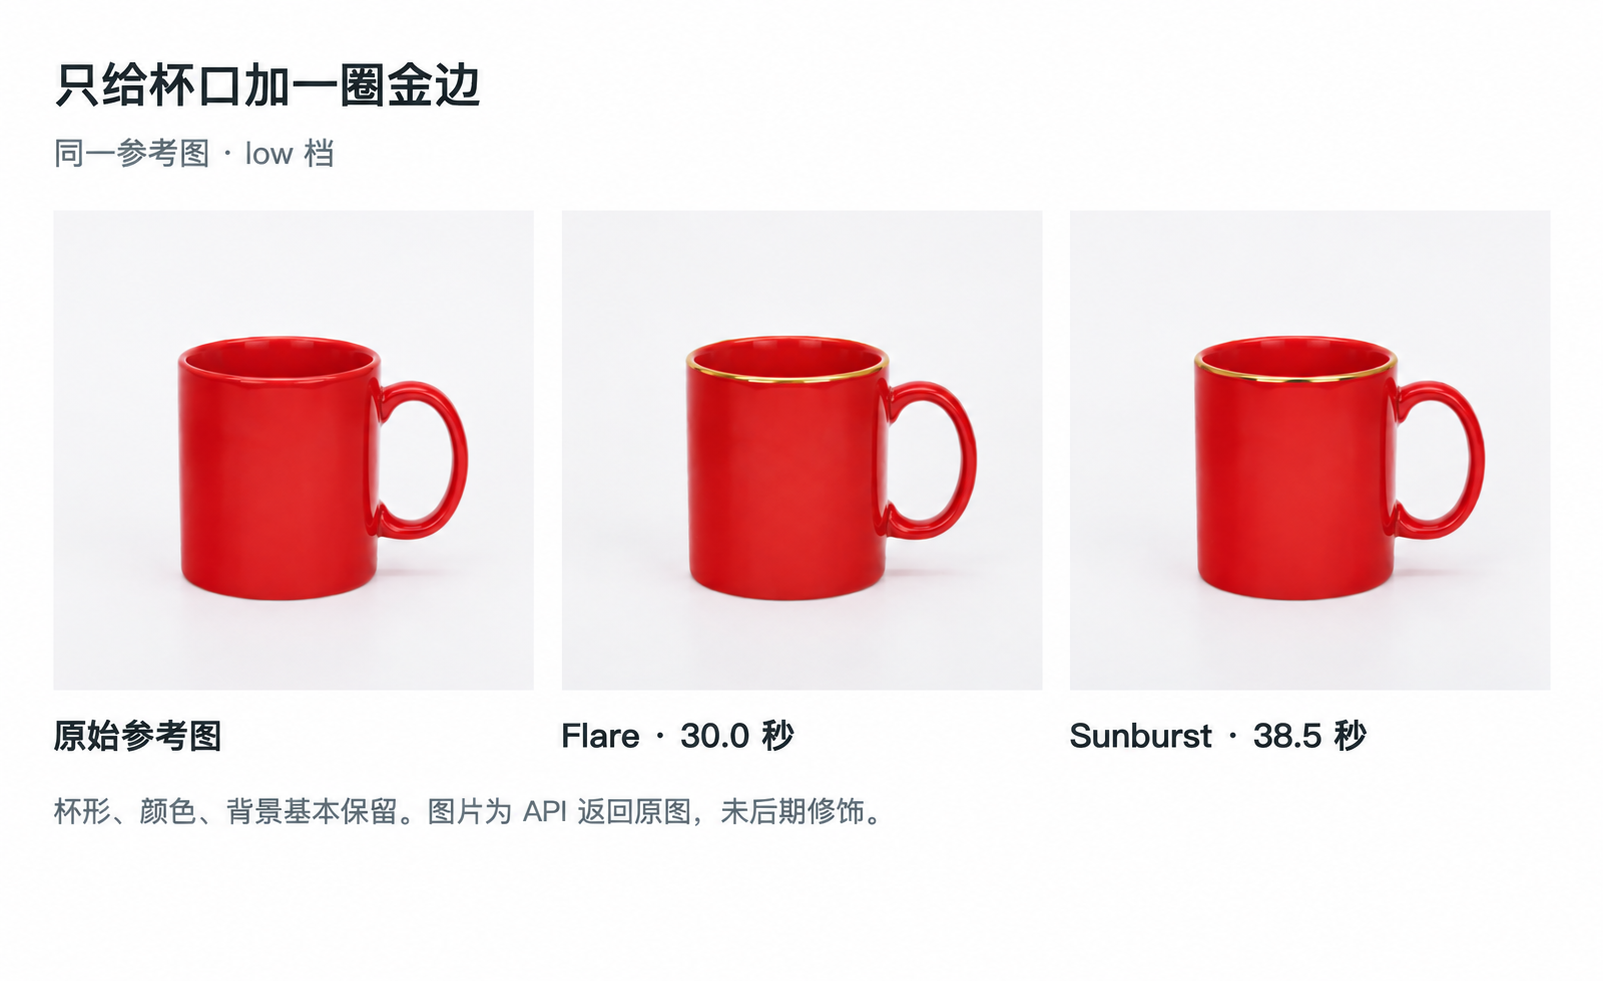
Figure: The original cup is on the left, the Flare edit in the center, and the Sunburst edit on the right.
Give two references one shared light source
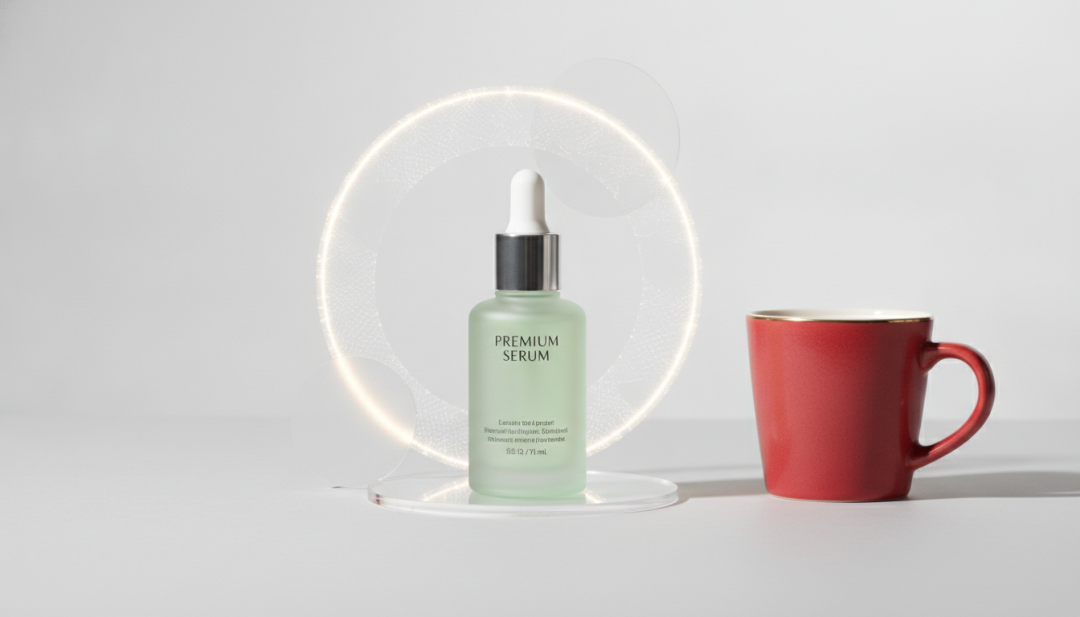
When combining a red cup and a glass bottle, assign each reference a clear role: one supplies the cup's shape and color, while the other supplies the bottle's appearance. Specify their relative position, size, camera perspective, and shared light direction. After compositing, check that both contact shadows sit on the same surface, highlights point in a consistent direction, and the cup reflections still suit its material.
The prompt can specify that the cup sits on the left, the bottle slightly behind it, and both are lit by a soft source from the upper left with contact shadows on the same tabletop. Check the cup's color and outline and the bottle's shape and cap against their references, then review depth order, perspective, shadows, and highlight direction. A request to “combine these images” alone can leave the model to change scale, viewpoint, or color, and can make the objects look pasted onto the backdrop separately.
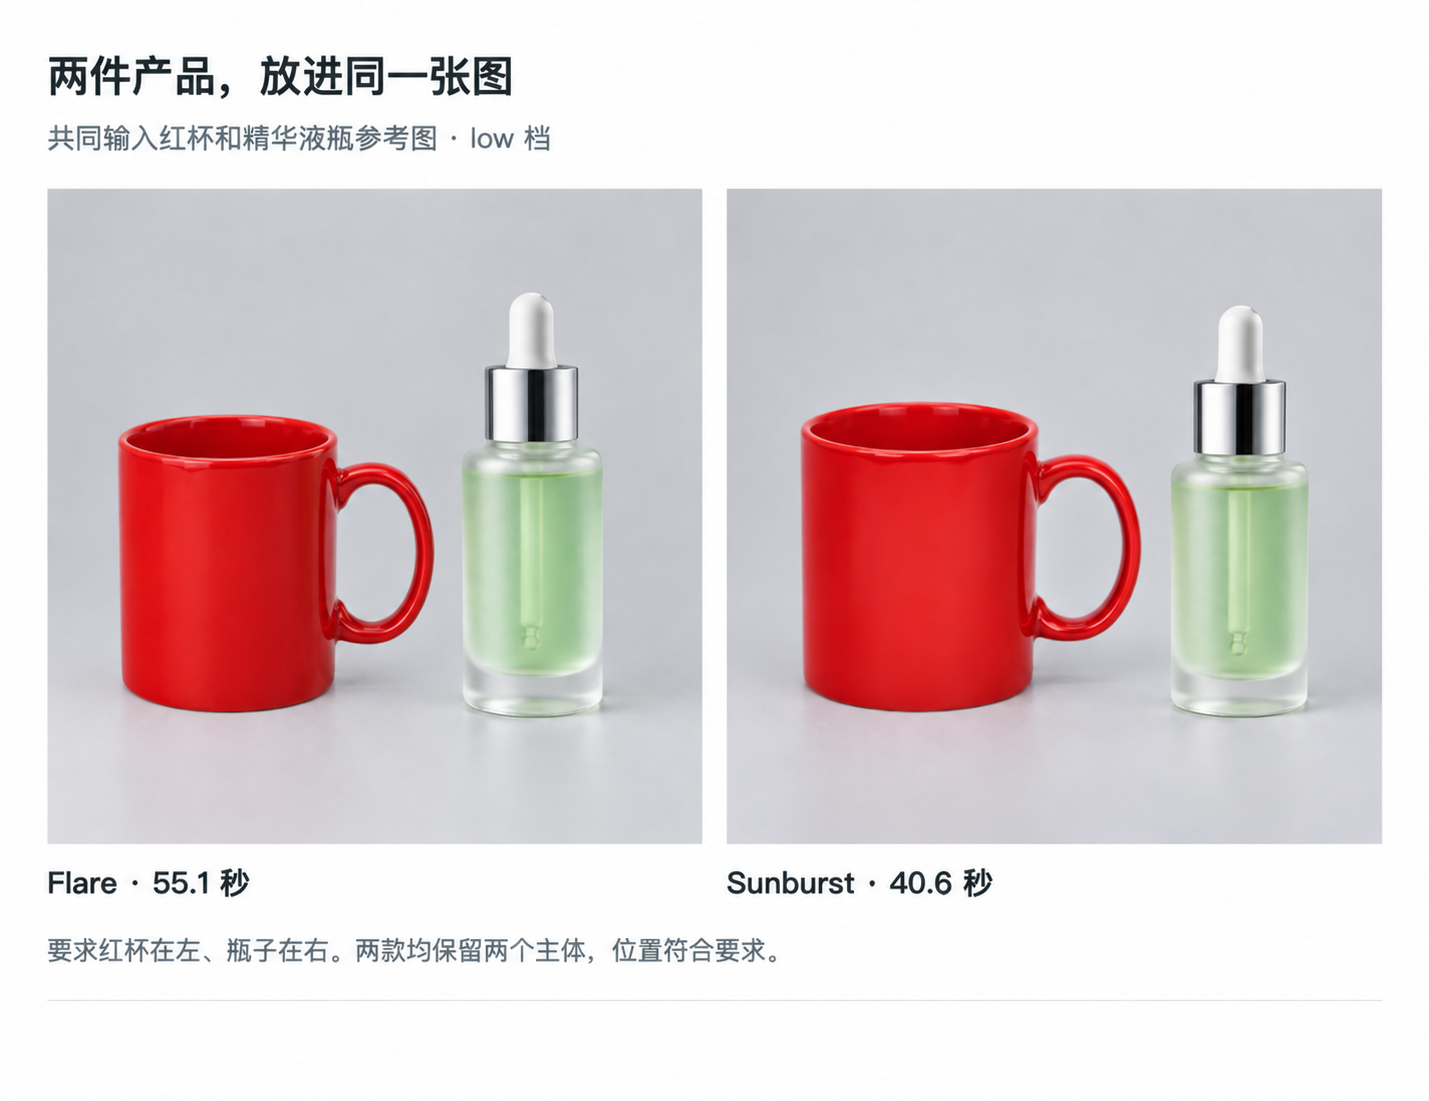
Figure: The Flare composite is on the left; the Sunburst composite is on the right.
A concise delivery checklist
- The file is PNG with an alpha channel, not a white fill that looks transparent.
- Glass edges and shadows have been checked on light, mid-gray, and dark backgrounds.
- The product has no unintended text, logos, numbers, or watermark.
- A local edit preserved the product outline, proportions, and unrelated objects.
- A composite uses consistent light direction, contact shadows, and perspective.
- The output dimensions fit the page; transparency is checked again after conversion, cropping, or compression.
Transparency is only one part of a usable asset. The more important checks are whether the edges look believable, local details remain intact, and the product still feels natural when placed on a new background.